Implementing request-reply service in gRPC for .NET
10 Nov 2019With this post it’s time to get into the first service build with gRPC. First of all, we’ll use the dotnet command to create our solution:

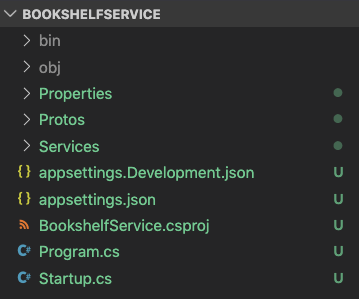
When finished, in Visual Studio Code the project will look like this:

We need to check the project and take a look into these items:
- The
Services\*.csfiles: contains the server-side implementation; - The
Protos\*.protofiles: contains the Protocol Buffer file descriptors; - The
Startup.csfile: register the gRPC service by calling theMapGrpcServicemethod;
Build our BookshelfService
Our first version of BookshelfService implements a simple method that allows saving a Book into our Bookshelf. To proceed, we need to change the default greet.proto by renaming to our brand new bookshelf.proto and changing its content with the following code:
syntax = "proto3";

option csharp_namespace = "BookshelfService";

package BookshelfService;

// The bookshelf service definition.
service BookService {
  // Save a Book
  rpc Save (NewBookRequest) returns (NewBookReply);
}

// The request message containing the book's title and description.
message NewBookRequest {
  string title = 1;
  string description = 2;
}

// The response message containing the book id.
message NewBookReply {
  string id = 1;
}
Now, we can open the GreeterService.cs and rename the class, and the file, into BookServiceImpl. Something like this:
namespace BookshelfService
{
    public class BookServiceImpl : BookService.BookServiceBase
    {
        private readonly ILogger<BookshelfServiceImpl> _logger;
        public BookshelfServiceImpl(ILogger<BookshelfServiceImpl> logger)
        {
            _logger = logger;
        }

        public override async Task<NewBookReply> Save(NewBookRequest request, ServerCallContext context)
        {
            // service implementation
        }
    }
}
Finally, be sure to change the MapGrpcService into your Startup.cs with this line:
endpoints.MapGrpcService<BookServiceImpl>();
Now, you’re ready to run your first gRPC service.
Wait, what happens? Let’s take a look under the hood
As previously said in this post the .proto file is responsible for the service definition. So, every time you change the .proto content, language-specific tools will generate the related objects. In our case, a set of C# classes. You can describe your service and the related messages by using a meta-language: the proto syntax.
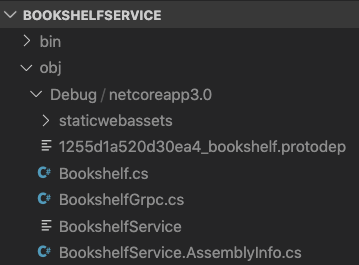
As you can see, we have defined two messages (NewBookRequest and NewBookReply) and a service (BookService). The Protocol Buffer tool will generate the messages as .NET types and the service as an abstract base class. You’ll find the generated source file in the obj folder.

Finally, to implements our service, we only need to extend the BookServiceBase class and overrides the defined methods. For example:
public override Task<NewBookReply> Save(NewBookRequest request, ServerCallContext context)
{
    var savedBook = BooksManager.SaveBook(request.Title, request.Description);
    return Task.FromResult(new NewBookReply
    {
        Id = savedBook.BookId
    });
}
Conclusion
This is a small example of a simple request/reply service integrated into an ASP.NET Core 3 application. You can test it by using BloomRPC or by creating a .NET client. We will see the second option in the next post.
Enjoy!
check full code on github


