Deploy .NET 6 Blazor WebAssembly on AWS Elastic Beanstalk
28 Feb 2022This post is the first in a new series looking at .NET on AWS. Why AWS? The answer is … why not! Perhaps not everyone knows that .NET is a first class citizen on AWS. Right after the Java SDK, .NET SDK was one of the first SDKs released in early 2010.
In this post, we will explore one of the alternative ways to deploy a Blazor WebAssembly application on AWS Elastic Beanstalk. We will use GitHub as the repository and AWS CodePipeline to retrieve the source code, build the project, generate the required artifacts, and then deploy it to the AWS Elastic Beanstalk instance. And the target framework for the project is .NET 6.
Before we get into the steps, a few words about the AWS services we will be using:
- AWS Elastic Beanstalk: an easy-to-use service for deploying and scaling web applications and services. This means that we can simply work on our code and the engine automatically handles the environment stuff needed to successfully execute the application, like deployment, capacity, load balancing, auto-scaling, and things like that. If you prefer, you can also modify all the environment settings to better fit your needs. More info at the official page.
- AWS CodePipeline: a fully managed continuos delivery service. With CodePipeline you can automate the build and deploy service. More info at the official page.
Create the AWS Elastic Beanstalk instance
First, we create the Beanstalk project that will host the application. In the AWS console, we can search for Beanstalk and select the appropriate scope:

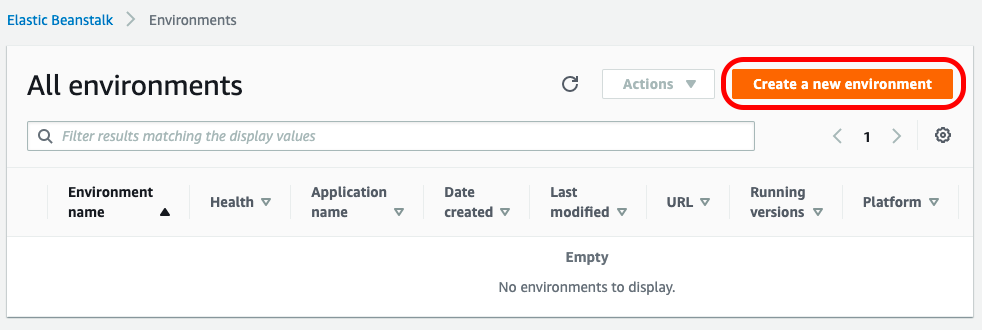
To run our Blazor application on AWS, we need to create a new Windows environment in the Elastic Beanstalk section. To do this, click on Create a new environment:
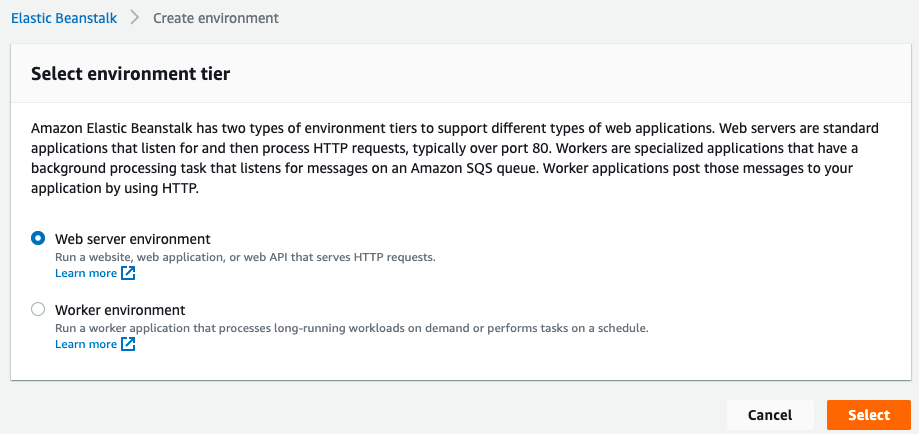
then select Web server environment:
and finally, after setting the name, we need to set the .NET on Windows Server platform:
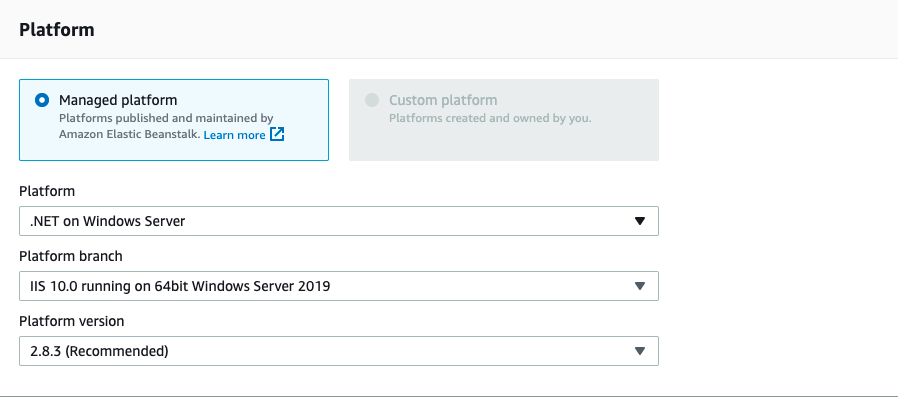
Be sure to leave Sample Application selected on Application Code, this is a good starting point to have a preconfigured environment, and then click the Create environment button at the bottom of the page. After a few minutes the environment is ready and we can start the next step: building the pipeline.
Build with AWS CodePipeline
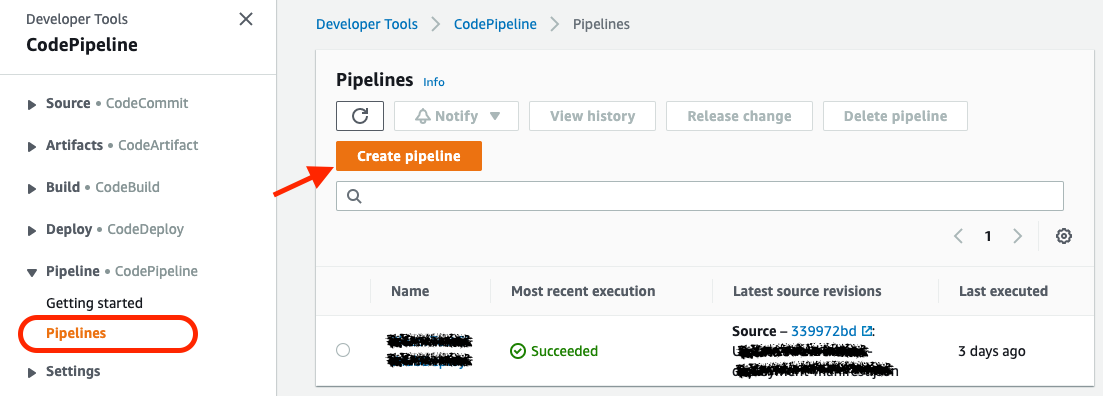
With CodePipeline, you can create your build pipeline on AWS, pull source code from GitHub, and deploy all artifacts to Elastic Beanstalk. Now go to CodePipeline and click the Create Pipeline button:
Define the Pipeline name and click on Next:
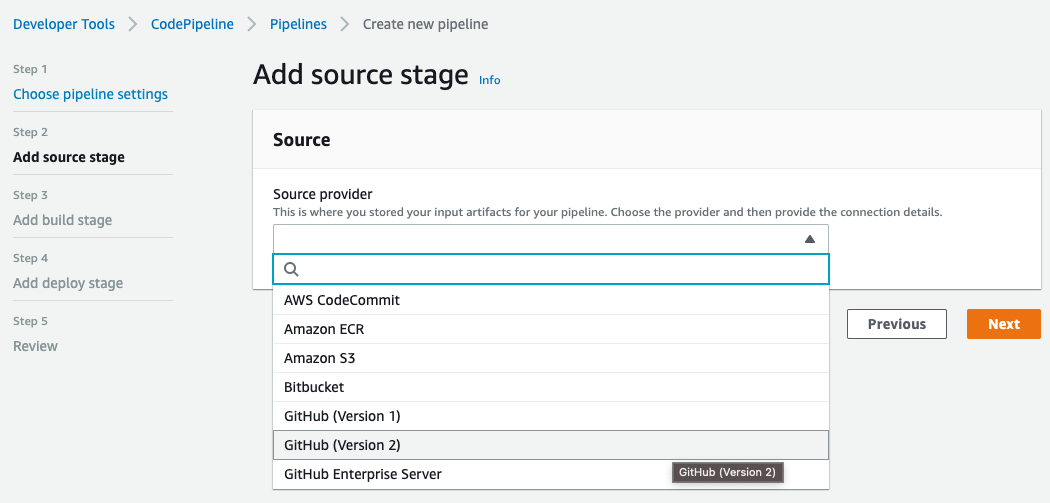
Select GitHub (Version 2) as Source provider. Then create a new GitHub connection by clicking on Connect to GitHub button:
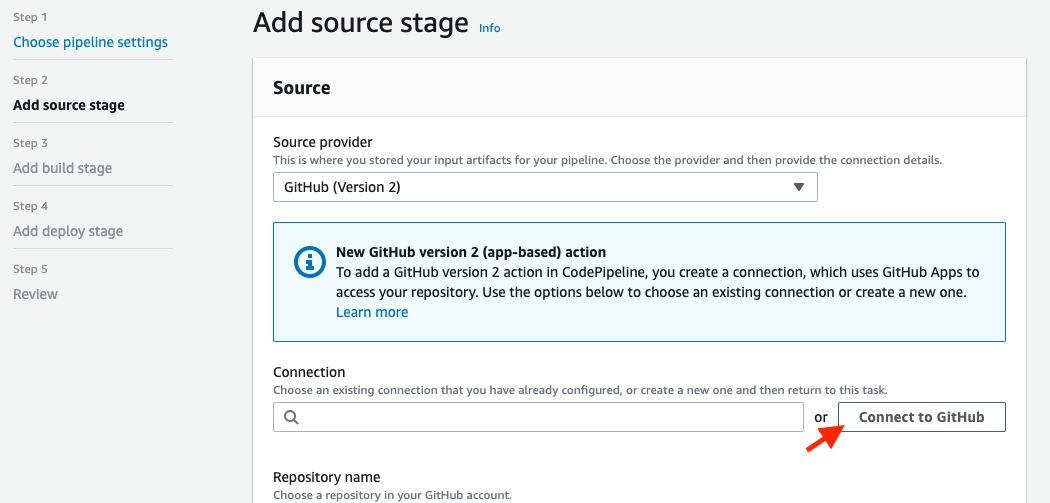
Configure the GitHub connection
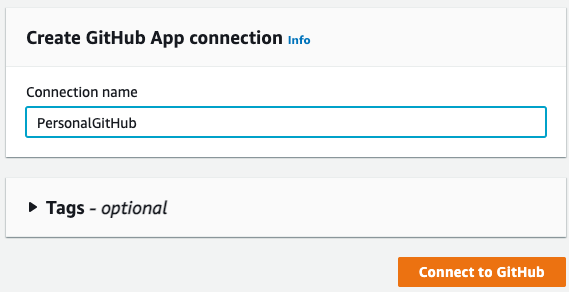
To use GitHub as a source, we first need to connect to our account. So on this page, set a name for the new connection and click Connect to GitHub:
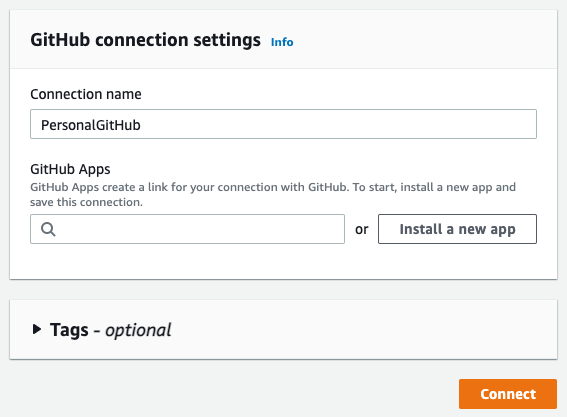
Click Install a new app to install AWS Connector for GitHub on your GitHub account and follow the instructions on the page. Then click Connect to complete this step:
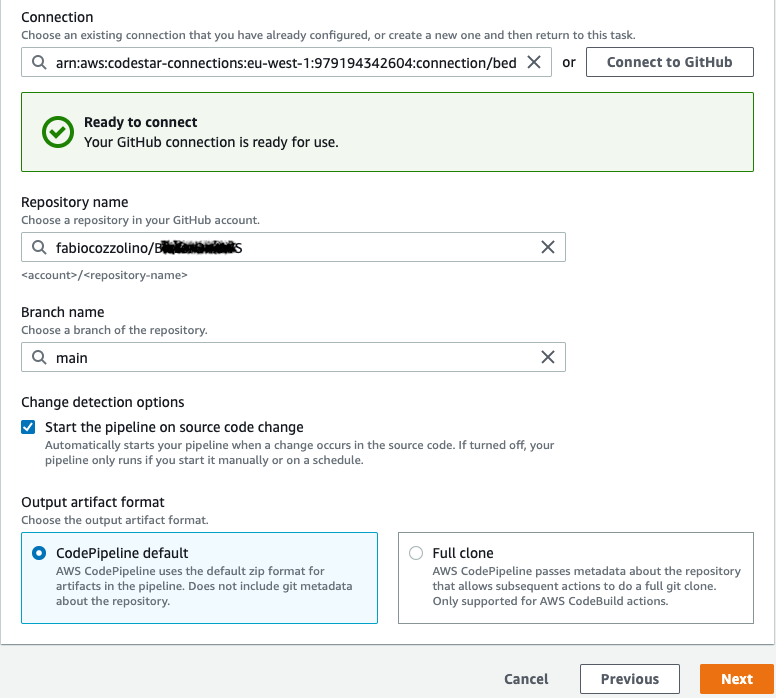
Now you can complete the GitHub source configuration by selecting the Repository and the Branch name and clicking to Next:
Setting up the build stage
After defining the source code repository, we need to create the build stage. In our project, we select AWS CodeBuild as the engine for the build. Specify your preferred region and create a new build project by clicking Create project:
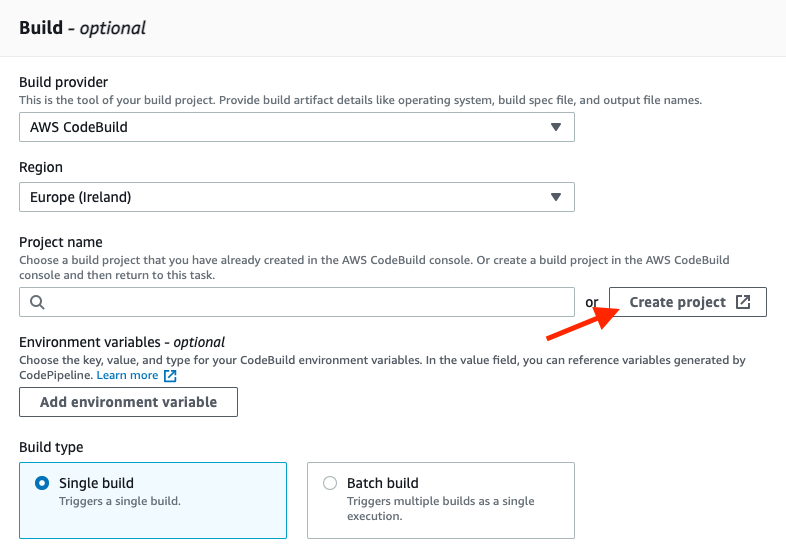
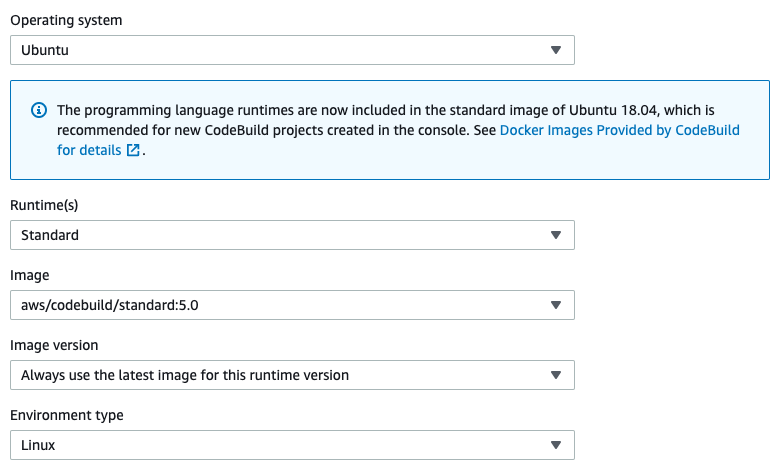
Here, after setting the Project name, go to the Environment section and choose Ubuntu as the operating system, as you can see in the image below:
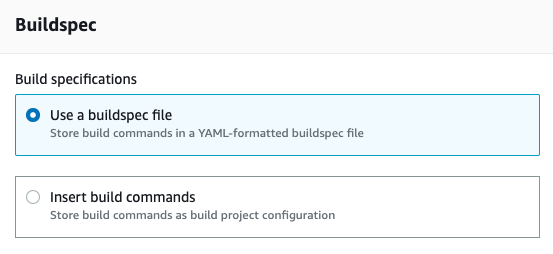
Make sure that the Use a buildspec file option is already selected in the Buildspec section. This file is needed for configuring the build phase in the Blazor project. We’ll talk about the buildspec.yml file later:
Define the Deploy stage
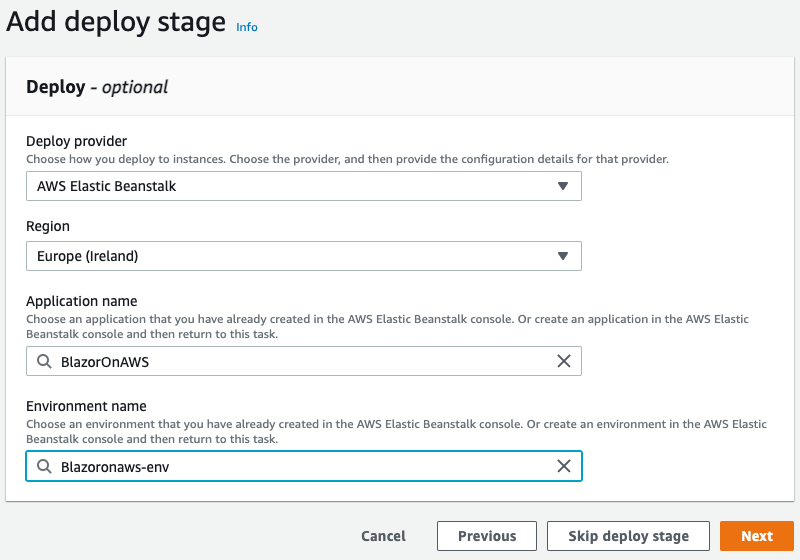
At the end of the pipeline, all artifacts in our environment must be deployed. So, configure the deployment phase for AWS Elastic Beanstalk, as you can see in the figure below:
Configure the Blazor project
The final step is project configuration. AWS CodeBuild, which is used by AWS CodePipeline, requires a set of specific instructions to build your project. All of these instructions must be written in the buildspec.yml, a build specification file. This file must be located in the root directory of your source code. For more information about this file, see the following page.
To build a Blazor project, I found the following ‘buildspec.yml’ very useful and simple:
version: 0.2

phases:
    install:
        commands:
            - /usr/local/bin/dotnet-install.sh --channel LTS

    build:
        commands:
            - dotnet build -c Release ./BlazorOnAWS.csproj
            - dotnet publish -o dist

artifacts:
    files:
        - dist/**/*
        - aws-windows-deployment-manifest.json
The above file consists of two main parts: the phase definition and the artifact output. In the phase definition, we first need to be sure that the latest .NET versions is already installed. Unfortunately, the images used in AWS CodeBuild don’t currently support .NET 6. Therefore, we need to use the dotnet-install.sh command to install it just before the build commands. For more information about the script, see this page.
After the installation phase is complete, the build phase runs the dotnet build and the dotnet publish commands and copies the output to the dist, the custom output folder.
The final step is to create a package with the output from the dist/**/* directory and the aws-windows-deployment-manifest.json file, which the Elastic Beanstalk Windows container reads to determine how to deploy the application. Here’s the content of the file I used in my example:
{
    "manifestVersion": 1,
    "deployments": {
        "aspNetCoreWeb": [
        {
            "name": "test-dotnet-core",
            "parameters": {
                "appBundle": "dist",
                "iisPath": "/",
                "iisWebSite": "Default Web Site"
            }
        }
        ]
    }
}
The manifest file, stored in the generated artifact as a zip file, indicate the dist folder as appBundle, giving instruction on AWS Elastic Beanstalk on how to deploy the application. More info about the file specification are available here.
Run the app
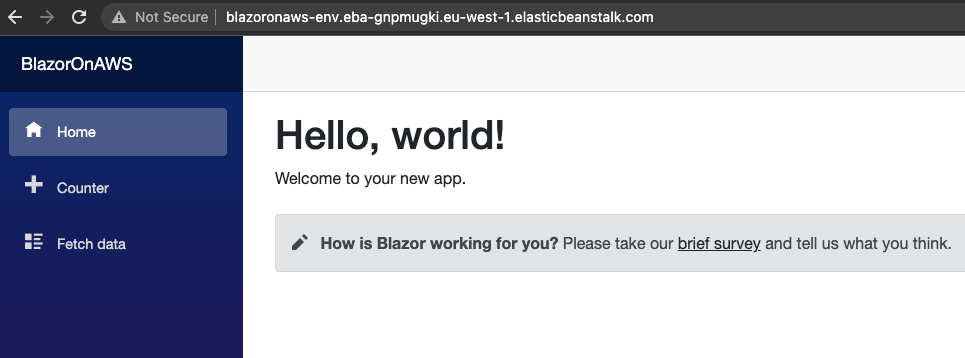
Now all the things are ready. Based on our configuration, the pipeline runs after each change in the GitHub source repository. At the end, you can go to the Elastic Beanstalk instance, click on the instance urls, and enjoy your Blazor WASM app:
As always, any feedback is welcome!
Enjoy!


